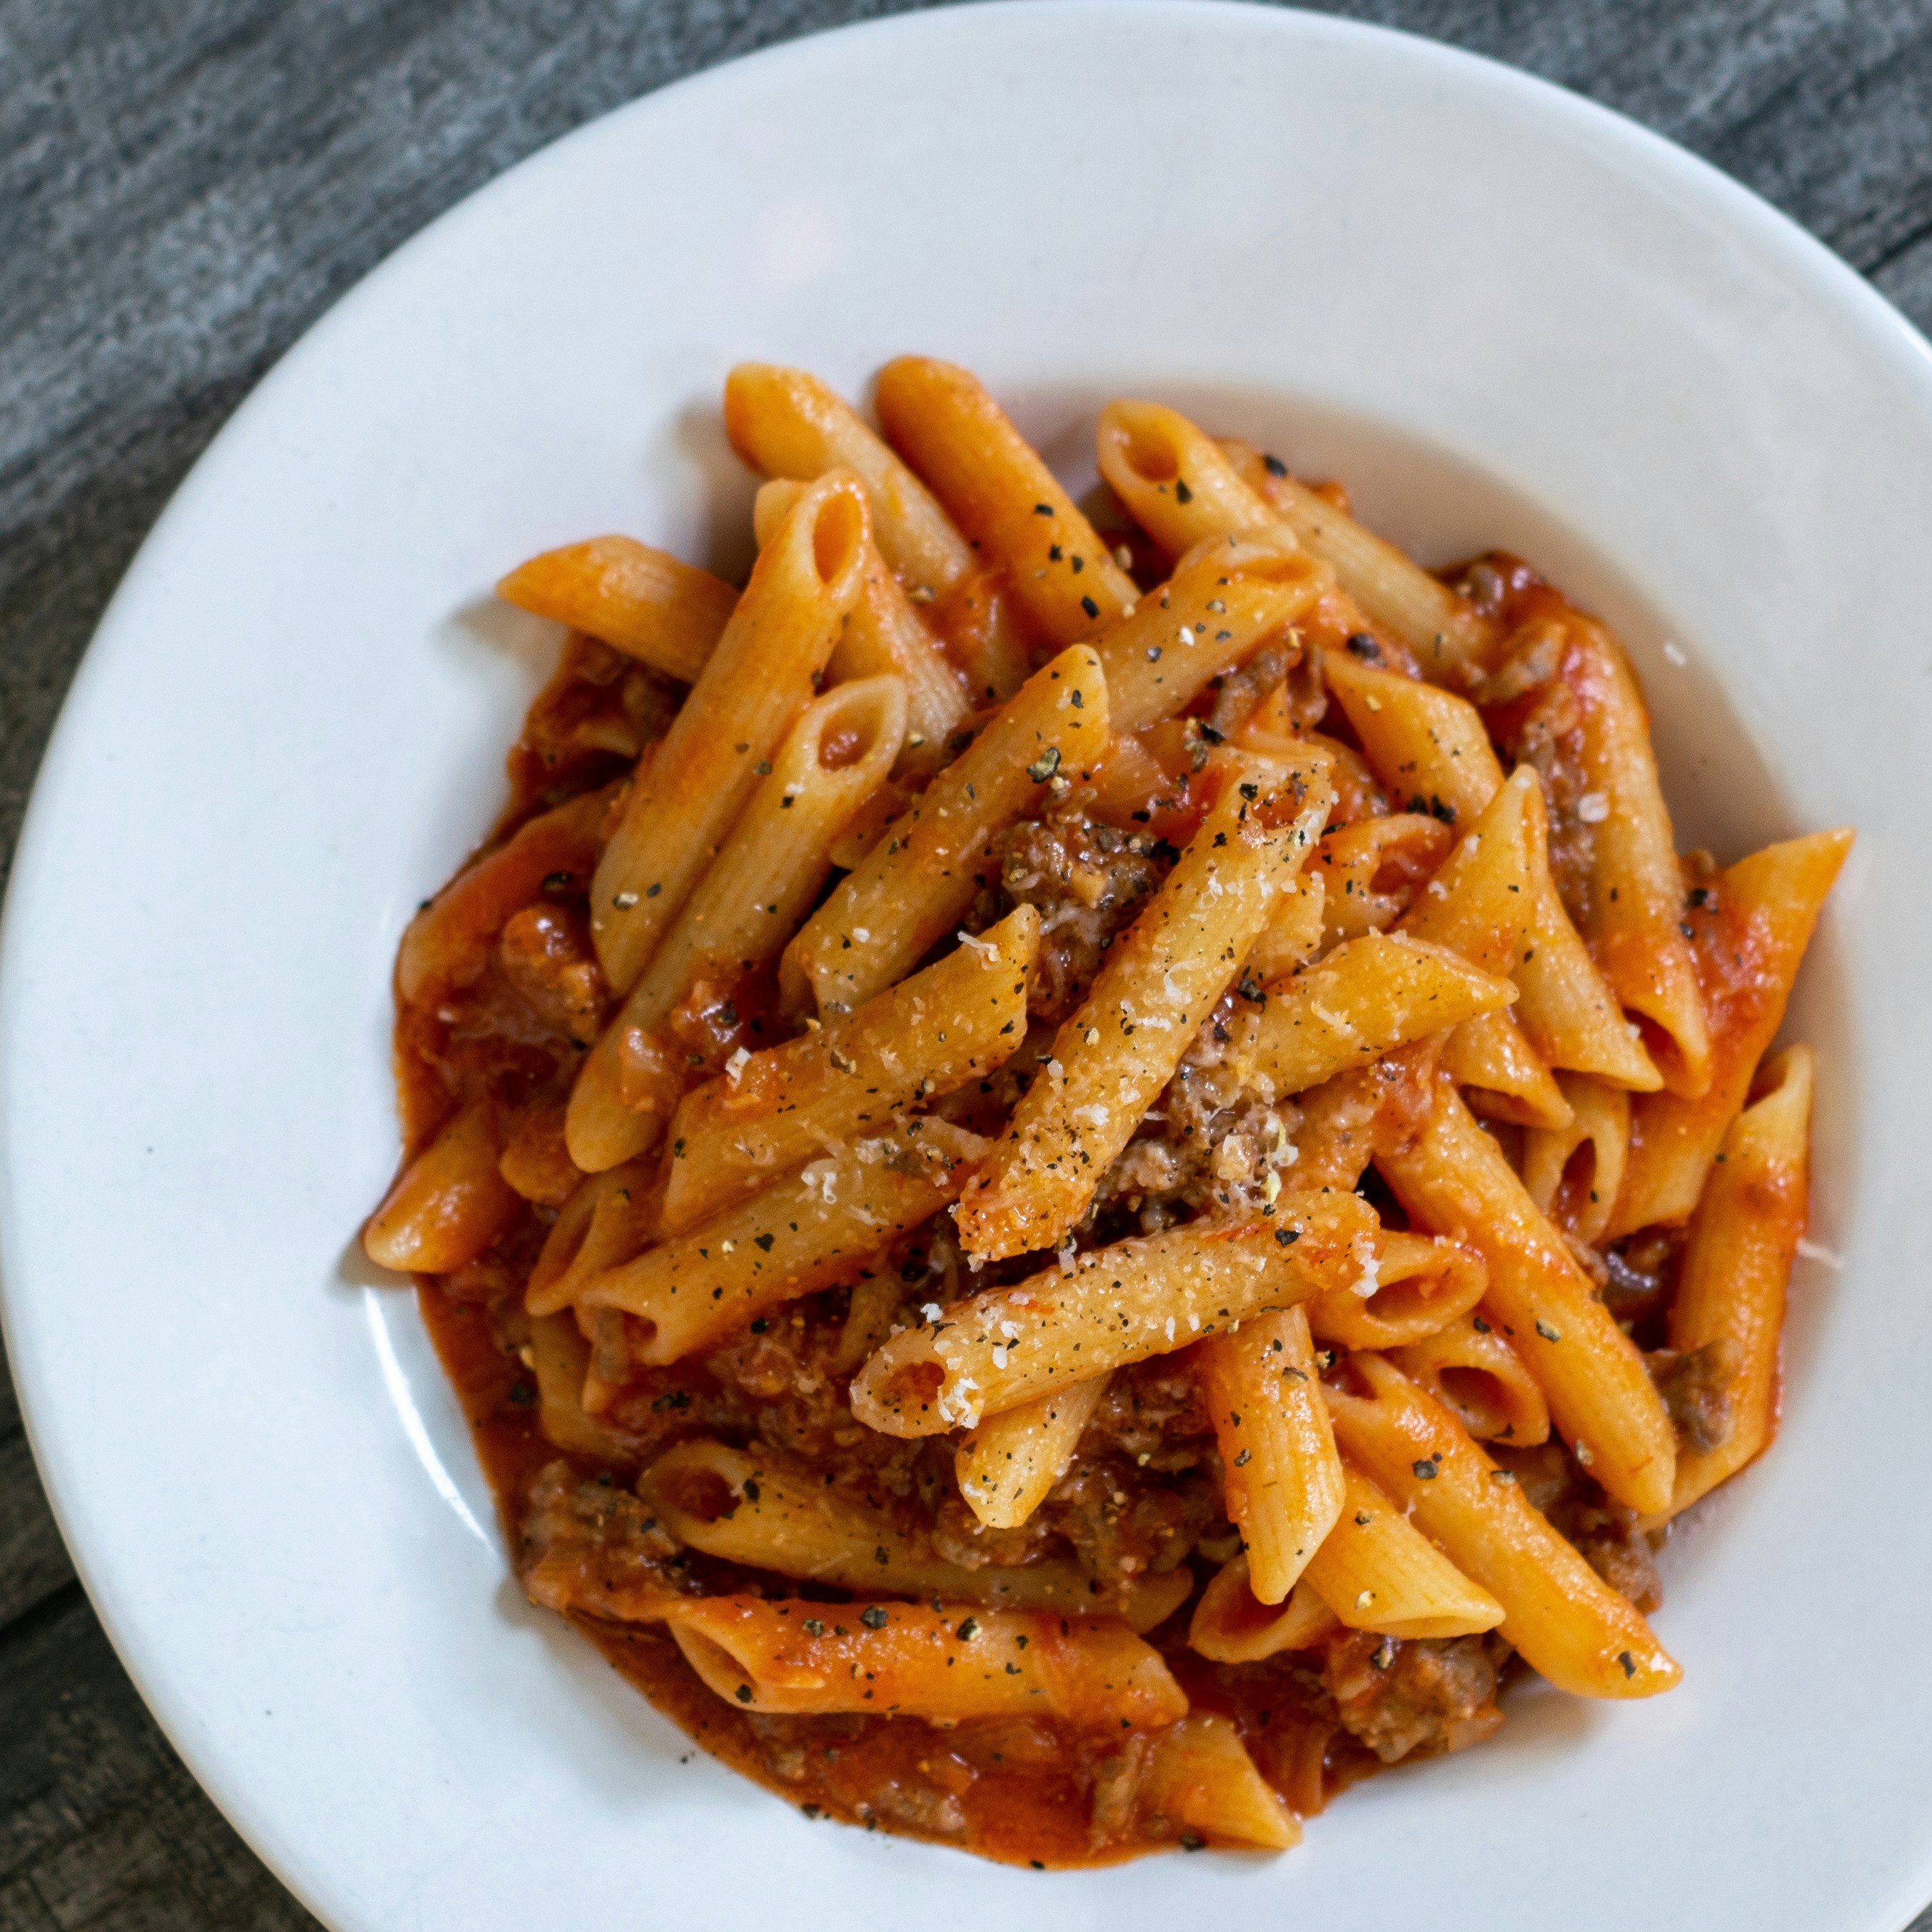
Schedule Change

Dear Readers,

Due to a new work schedule, I will be changing the release day of the weekly blog from Thursdays to Sundays. I hope you all continue to enjoy my blog and recipes continuing on every Sunday.

Thank you,

Ed Robinson


Lemongrass Rubbed Game Hen & Artichokes with a Garlic Ginger Aioli

This week’s recipe is truly in the 5ive Dollar Feast tradition. In a recent trip to the store, I found the following ingredients on a great discount: Cornish game hens, lemongrass, and artichokes. I bought all three determined to make a good meal out of them that paired well together.

I’ve roasted a lot of chickens and hens in my day. Normally I rub a bird with an herb butter, such as my Butterflied Chicken over Celery Root, or I glaze them, like my Imperial Indian Hens. I wanted to try an Asian inspired bird this time, since the lemongrass would lend itself well to that. It was something I hadn’t tried before.

My solution was to create a marinade of lemongrass, sriracha (leftover from recently making some Hawaiian Spareribs,) and a hefeweizen beer. Then I wanted to roast them in the oven. I don’t own a roasting pan that fits into my small oven, however. Luckily, necessity is the mother of invention, as they say, and I came up with a plan. Only the bottom third of lemongrass is really usable in a recipe, as that is where the soft meaty part of the lemongrass is. The top two-thirds are usually discarded. I decided to create a V-shaped roasting area in my pan by leaning half of these stalks on either side of the pan. It ended up adding more flavor to the dish as well as being visually appealing. Any guests you have will be very impressed when you serve the hens from this lemongrass roasting rack.

The result was an American-Thai fusion game hen that was very tender and full of flavor, with just a little kick from the sriracha.

But how to tie the Artichokes into the dish? I steamed the ‘chokes like I usually do, but needed to change my usual garlic aioli. I added ginger powder and a touch of cayenne pepper to my usual aioli recipe and it was delightful. All the usual enjoyment of artichokes, without the side dish jarring you out of the thai fusion style meal I had created.

This whole meal paired extremely well with a very cheap low alcohol wine from Portugal known as Vinho Verde. Check your local wine shop to find a bottle. This meal was really a gamble on my part, but sometimes you are lucky enough to find that your gambles in the kitchen really pay off and I wanted to share this creation with you to help inspire you not to be afraid to combine unique ingredients together that you find on sale.

Lemongrass Rubbed Game Hen

2 game hens

8 stalks of lemongrass

1 Tablespoon Sriracha or Sambal Olek

3 cloves of garlic

¼ of bottle (12 ounces) of your favorite hefeweizen or wheat beer

1 teaspoon dried ginger (or 1 Tablespoon minced fresh ginger)

salt to taste

  1. Create the marinade. Begin by removing the top two thirds from each lemongrass stalk. Reserve them for later in the recipe. Remove the outer leaves of the lemongrass until you are left with the soft inner ‘meat’ of the stalk.
  2. Combine the soft lemongrass ‘meat’ with the sriracha or sambal olek, garlic, beer, ginger, and salt in a food processor. Puree until well combined. (You can also finely mince all of these ingredients, the food processor will just make the job easier and faster.)
  3. Pour the marinade over the two hens. Be sure to use your fingers to loosen the skin from the breast meat and allow rub the marinade between the skin and the meat.
  4. Marinate from 4 to 12 hours.
  5. Preheat the oven to 375 degrees. Remove the hens from the refrigerator for 15 minutes to allow the hens to come to room temperature.
  6. Create a V-shape in your pan by leaning the upper stalks of the lemongrass from the sides of the roasting pan down into the center of the pan on either side.
  7.  Place the hens in this V and roast them at 375 for 1 hour, basting every 20 minutes.
  8. Remove the hens from the oven and raise the heat to a broil. After 5 minutes, return the hens to the oven for 10 more minutes until the hens are nice and brown. Remove from the oven and let the hens sit 10 minutes before serving. The internal temperature should be 160 degrees.

Garlic Ginger Aioli

1 cup mayonnaise

2 Tablespoon lemon juice

3 clove of garlic, pressed or minced

1 Tablespoon ginger powder (or 2 Tablespoons ginger juice, squeezed from a ginger root.)

1 teaspoon cayenne pepper

Combine all ingredients and mix well. Serve as a dip for steamed or grilled artichokes.


Cinco de Mayo Recipe – Cochinita Pibil

During our honeymoon on the Yucatan peninsula, Jodie and I took a day off from relaxing on the beach of our resort to take a day’s tour out to Chichin Itza, the most famous of the Mayan ruins. After an amazing day climbing the stairs of the pyramid (which you can’t actually do anymore. So sad.) and getting great photographs, we got back on the bus at the appointed time to head back for more margaritas con hielo by the pool.

On the way back, our tour guide told us where we would be stopping for lunch. It was a locally owned water park (which turned out be a small pool and a waterslide) that would have a buffet set up in their restaurant. He went on to explain that while there would be American options, he recommended (raved about, might be more correct) the local dish that they were famous for preparing.

Jodie and I didn’t really catch the name, but he explained that it was pork marinated with orange peel and cooked in banana leaves. Jodie and I glanced at each other. We knew what we were having for lunch. (I’m a fan of things cooked in leaves, I’ve noticed: Greek dolmas and Hawaiian lau lau both top my list of favorite foods.)

When we entered the restaurant, we passed by the ‘American’ buffet. It was full of processed chicken nuggets, cardboard pizza, and dried out spaghetti with what appeared to be canned tomato sauce.

Jodie and I mentioned to each other that it was sad that’s what they thought American food was. Of course, there was no way anyone was going to eat from that buffet, with the beautiful oven in the corner. Two women were making fresh tortillas and serving pork straight from the banana leaves. It was amazing. One of the best meals we’ve ever had and easily the most memorable from our honeymoon.

When we were done ‘oohing’ and ‘ahhing‘ over our food, we came up for air long enough to see how our bus-mates were enjoying this heavenly pork. What we saw saddened and dismayed us. Not a single American had tried the pork. In fact, only one other family on the bus had, and they were of latin descent themselves. We tried to talk the people near us into trying the local cuisine, but they all told us that it was too adventurous for them. The latin family talked to us briefly and told us they were enjoying it as much as we were, and we all went back for seconds (and thirds for some of us.)

The problem was we never caught the name of the dish. I’ve described it several times and searched for the ingredients on google, but with no success. Finally, I recently heard Chef Micheal Symon describing his favorite Mexican dish, cochinita pibil. I was amazed to hear him describe pork marinated in orange juice and cooked in banana leaves! I made sure to write down the name and searched the internet, now armed with the name of the dish, and I found several recipes!

I read through several of these recipes and then took a trip to Superior Grocers, our local Mexican grocery store to see what I could find. I was shocked to find banana leaves for just under two dollars, as well very affordable pork. I also located achiote paste, which is essential to give the pork the flavor I remember so well from the Yucatan. I combined several recipes that sounded the most affordable and the most like what I had tasted in Mexico. None of them actually called for cooking with the orange peel, but I remember that our tour guide was very clear on that, so I made sure to add actual peel into the marinade, which gave the pork a bright crisp taste I loved.

Cochinta Pibil

The pork needs takes at least 24 hours to marinate and 4 hours to cook. This is special occasion food, make sure you have the time!

2 large banana leaves

tin foil

3 to 4 pound shoulder pork roast, cut into 2” cubes

marinade: (sour orange juice is the most traditional, but it’s easily recreated by adding lime juice to the OJ.)

1 ½ cups OJ (start with the fresh squeezed from 1 orange and then supplement with a carton of OJ to save money)

½ cup lime juice

3 ounces of achiote (or annatto) paste

5 garlic cloves, minced

The peel of 1 orange, broken into several chunks

1 tsp cumin

1 cinnamon stick

salt & pepper to taste

  1. Dissolve the achiote paste into the orange juice and lime juice. Add the garlic, orange peel, cumin, cinnamon stick, salt & pepper. Add the cubed pork. Cover, and marinate in the fridge for 24 hours up to 48 hours.
  2. Preheat the oven to 300 degrees.
  3. Warm the banana leaves over the stove or a grill briefly to make them more pliable. Be careful to flip them repeatedly as you do not want to burn them.
  4. Place one or two banana leaves on the bottom of the casserole dish. Add the pork and marinade to the leaves.
  5. Wrap the leaves as much as you are able over the pork. You will probably need to add another leaf over the top and tuck it in around the sides of the pork. Cover the whole assembly with tin foil and roast for 4 hours at 300 degrees or until fork tender.
  6. Unwrap the pork and serve. It’s great over rice or served in a tortilla that has been lightly grilled or cooked over an open flame on your stove. Top with grated queso fresca and your favorite salsa. (Perhaps my roasted tomato salsa recipe)

That’s a Wrap! (no, not the sandwich kind)

It has been a whirlwind beginning to 2012. In a good way. The year started with fundraising for our web series, Pairings. We reached our goal and moved directly into pre-production and then into production. I has been more than a full time job on top of a full time job for Jodie plus lots of personal chef work for me. Its the busiest we’ve ever been in our lives, but also one of the most successful and rewarding times.

Last week marked the wrap for Pairings! (That means we are completely done shooting.) There is still lots to do. We now enter the post production phase (that’s editing, music, scoring, color correction, sound mixing etc.) I will keep you updated on our progress, but I will be bringing you lots of new budget friendly recipes starting next week for Cinco de Mayo. (Upcoming we have another whole salmon recipe, some delicious veggie sandwich ideas, and more grilling recipes for the summer, plus ‘what the hell is parsley root,’ so stay tuned!)

Here are some of our favorite food images from the shoot (and a few of our other favorites.)

Making Stout Braised Lamb Shanks (follow link to recipe on Feasts)

The Wallaces drinking home brewed stout.

Rose makes salmon sushi

Alan makes lasagna. One for him, one for friends who just had a baby.

Kim tries the soup at a trendy L.A restaurant.

Yvonne tries Alan’s Madelines. (I, ahem, left out one of the ingredients the first time I posted this. There are no eggs listed, but eggs are called for in the directions. My apologies. Follow the link for corrected recipe.)


Our One Year Anniversary! We Made Birthday Brookie Sundaes! (Cookie Brownies)

April 14th marked the 1 year anniversary of our blog! I can hardly believe it has been a whole year. One blog a week has been challenging at times, but 81 recipes and 53 blogs later (OK, so sometimes more than challenging, I did miss one week,) I have grown tremendously as a chef and a writer trying to find interesting yet affordable recipes to share with you.

I have heard from many of you that you have tried and enjoyed many of my recipes in your kitchen, and I feel honored every time.  It is truly inspiring to think of you letting me into your lives like that.

We started small, with only 10 readers every day, but have slowly grown to close to 100 readers a day. (If we keep it up at that pace, we’ll have 1,000 readers a day next April!) It has been and continues to be very important to me that this blog not just be a temporary hobby. The more I write and cook the better I get at it, and the more interesting meals I can share with you. And Jodie’s portfolio of food photography went from a few scattered images to so many amazing shots that there are too many for one portfolio.

And, of course, this all has culminated in a beautiful show we are so proud to be producing: Pairings. We have one more weekend of shooting before we wrap. There is still much to do before we can bring you the show (editing, music, sound, etc.) but we will have a 7 episodes for you to watch in the fall! Much of our fundraising came as a direct result of this blog and we thank you so much.  We will continue to bring you a blog every week for the next year. We plan to use Pairings and 5ive Dollar Feasts as complimentary projects. We have some exciting changes and surprises planned for the next year.

On a more personal note, this blog has brought me some solace and direction in a tumultuous time in my life and I am grateful for all of you who have followed me on my journey.

But enough of this serious nonsense. Who wants a brookie sundae?! What is a brookie you ask? It is my term for a dessert that I was inspired to make from a couple who inspired me to start my blog and offered us some early advice. Foodies @ Home posted a dessert that was part chocolate chip cookie and part brownie. This wonder dessert is so cheap & easy to makes any day seem like a special occasion.

I grew up having Brownie sundaes on special occasions. Think of BJ’s pizookie’s as an example. Fresh warm brownie, topped with ice cream and chocolate syrup. I thought that the Cookie Brownie or Brookie would make an even more delicious sundae and thus the creation of the Brookie Sundae! Pure heaven.

Brookie Sundaes

1 box of your favorite brownie mix for a 9 x 9 inch pan

chocolate chip cookie dough for 12 cookies (store bought is just fine for brookies)

Ice Cream

Chocolate Syrup

  1. Preheat the oven to the temperature indicated on the brownie mix box.
  2. Grease a 13 x 9 inch pan.
  3. Prepare the brownie mix in a bowl as directed on the package.
  4. Place 12 cookie sized dollops of raw cookie dough, spaced evenly. Pour the brownie mix around and / or over the cookie dough. Bake according to directions on the brownie package.
  5. Remove from oven, let cool for 15 minutes. Cut out a warm brownie and top with you favorite ice cream and chocolate syrup. Enjoy!

Easter: What to do with all those Hard Boiled Eggs – Baked Scotch Eggs

I confess. I am a 32 year old man and I still like to dye Easter eggs. Luckily, the last four years I have had my niece to use as an excuse for dying eggs, but I’d be lying if we said I didn’t dye eggs almost every year before that. (Although one year in college we had an Easter beer hunt instead. We all had a different six pack of brew that someone hid around the apartment. Ah, college.)

Of course now that I’m older my eggs usually look more like this:

So, if you either have kids, or you you’re a closet Easter egg dyer you always have more hard-boiled eggs than you know what to do with. Here are some ideas to use up all of those eggs (deep breath): Deviled eggs, egg salad, chef salad, Caesar salad topped with eggs, put a sliced egg on you burger, make some udon or ramen soup and place the halved eggs on top, make a brunch pizza topped with heirloom tomoatoes and sliced eggs (maybe add some capers, lox, sour cream and/or red onion at the end,) serve them sliced over English muffins topped with hollandaise, maybe pickle some eggs if you’re adventurous, Chinese tea eggs, or breakfast mice for the kids. (whew.)

Or you can make my personal favorite, Scotch Eggs. Scotch eggs originate from, you guessed it, Scotland, but are now a traditional pub menu item and are commonly made in the South (of the U.S.) The idea is to make a healthy food like a hard boiled egg as bad for you as humanly possible. First you wrap it sausage, then you bread it, and then you traditional deep fry it.

I tried to make it a bit healthier by baking the scotch eggs. I managed to keep most of the crispiness of the deep fried egg by brushing the scotch eggs with olive during the final minutes of cooking. If you wanted to make you eggs even healthier you could use turkey or chicken sausage in place of pork.

Baked Scotch Eggs

1 lb ground pork sausage (or 1 lb turkey or chicken sausage)

1 teaspoon dried sage

(If you don’t find sausage, you may use ground pork or turkey. Just be sure to season it with salt, pepper, and thyme as well as the sage.)

4 large eggs, hard boiled

flour for dredging

2 large eggs (not hard boiled)

approximately ¼ cup water

2 cups panko breadcrumbs

2 Tablespoons olive oil

  1. Preheat the oven to 400 degrees
  2. Mix the sausage thoroughly with the sage (or ground meat with all the spices above) and divide into four equal portions.
  3. Peel the hard boiled eggs, dip them in water and coat them in flour. Wrap each egg evenly in a portion of meat, being sure they are covered completely.
  4. Make an egg wash by beating the raw eggs with the water.
  5. Dredge the sausage coated eggs in flour, dip them in the egg wash and then coat thoroughly in breadcrumbs.
  6. Bake until golden brown on a cookie sheet at 400 degrees; about 30 minutes.
  7. Brush each scotch egg with olive oil and return to the oven for 5 more minutes.
  8. Serve for brunch.

What We’ve Been Up To

Please excuse our brief hiatus. We are took the last two weeks off from the blog because we’ve been shooting our food themed webseries, PairingsWe’ll be back this Thursday with a blog for Easter.

Meanwhile, here a few photos to enjoy from our filming.

ALAN making Madelines

JADE (Jessica Mills) teaches ALAN (yours truly) how to play guitar

Jodie makes a cameo

Spaghetti and Meatballs

DREW and ALAN converse over coffee and chocolate croissants

ALAN on a date with JILL


St. Patrick’s Day – Bangers & Mash with a Scotch Ale Onion Gravy

I want to be clear. I love Corned Beef and Cabbage, but you probably have you Corned Beef recipe by now if you celebrate St. Patty’s often. But, if you  want something different this year, or, if you’re like me and you throw a huge St. Patty’s party and want more than one option for your guests, or maybe you’re going to a potluck, my Bangers and Mash recipe is one of my favorites. I make it year round.

Bangers are a style of British or Irish peasant sausage that is made with rusk. And since that explains everything nicely, I’ll move on to the recipe.

Bangers & Ma- what’s that? You have know idea what rusk is? Why that would make it a peasant sausage or what that has to do with the name ‘banger’? Oh, I’m sorry, I am shocked that it wasn’t clear.

Well, rusk is basically bread. Specifically a wheat product used in the stuffing of the sausage to help the meat go farther. More rusk, more sausage. Hence, why it was good and cheap for the peasants. Rusk has the tendency to expand while cooking, causing the casing to pop very suddenly, creating a banging sound. To avoid this you should pierce each sausage with a fork several times to let the juices escape a little and keep the sausage from splitting (this is not a good practice for sausages without rusk. The rusk soaks up the juices of the meat, keeping the sausage moist, where piercing a regular sausage would dry it out.)

See, that was simple really. You would have figured it out on your own, right? Right.

Serve your bangers over mashed potatoes (the ‘mash’) and top with a gravy made from beer and carmelized onions. The onions take 50 minutes to an hour to carmelize and cannot be rushed, so while this recipe is not hard, leave yourself a good hour and a half to cook.

Bangers & Mash with a Scotch Ale Onion Gravy

2 Tablespoons olive oil

½ stick (1/4 cup) butter

6 to 12 bangers

4 to 6 onions, sliced pole to pole

2 sage sprigs, leaves removed and coarsely chopped

1 cup scotch ale (Scotch ale is a type of pale ale, but with dark roasted nutty overtones. Often called Wee Heavy or Kilt Lifter)

½ cup chicken stock

salt and pepper to taste

  1. Brown the sausages over medium high heat in the olive oil, 3 to 5 minutes per side. After flipping the sausage, pierce the cooked side of the sausage several times with a fork to keep the rusk in the banger from splitting the casing.
  2. Remove the sausage from the pan and turn heat to low. Add the butter. After the butter is mostly melted, add the sliced onions and a sash of salt (to help them cook faster.) Turn the heat to medium and cook the onions, uncovered, stirring occasionally for 50 minutes to an hour until a rich golden brown. The long you roast the onions, the richer the flavor.
  3. Deglaze (this is a fancy word that means, add liquid and scrape up any brown bits at the bottom of the pan) with scotch ale and chicken broth.  Add sage and then nestle the half cooked sausages back into the pan. Raise the heat to high and bring to a simmer. Simmer uncovered for 10 minutes or until the gravy is reduced by half.
  4. Serve sausages over mashed potatoes and top with gravy. Pair with beer or even a very flavorful white wine.

Chef’s Envy Mandolin and Pesto Caprese Salad

Welcome to my first Equipment Review on 5iveDollarFeasts. Today I’m going to take a quick look at the Chef’s Envy, one of the many home mandolins that have recently come on the market.

Recently, the Chef’s Envy has begun to have product demos at your local grocery store. You may have heard the announcements. Someone will get on the P.A system  and announce that they are, “giving away a free gift in five minutes! Just meet our representative in the produce department!” If you wander over to the meeting area, you’ll see a little cutting board and presentation area set up. Soon, the same gentleman who made the announcement shows up dressed like a chef.

He proceeds to show you some little knick knack, like a plastic juicer or vegetable peeler, demonstrates how to use it, and the tells you he’ll give you one for free at the end of the demonstration.

“Here we go,” you’ll think because we are naturally skeptical of anything free, “I’m not going to sit through a boring half hour demonstration for a free vegetable peeler. I’ll give him a couple minutes. At most.” And then he’ll bring out the Chef’s Envy, a mandolin for the home chef, and proceed to show you how to use it. While there will be some showmanship (I mean, mandolins have been around for a long time, and they talk as if this were a new invention) you’ll actually be suitably impressed at it’s ease of use. Then he’ll offer it to you for $29.99 with 3 blade attachments and hand out your free gift.

This all happened to me a few months ago. I accepted my knick knack and turned to leave because I was sure it wasn’t as easy to use as he made it look. My skepticism was actually overcome, however, because I’ve actually been wanting a mandolin to get nice easy slices for catering and food styling. I always feel that if something is too good to be true it probably is, but after thinking about it, it seemed like a good deal, but not so good as to be too good to be true.

Rationalizing that I was doing a service to my blog readers by buying the product and testing it, I went ahead and grabbed one.

And I have to say, I am very glad I did. I use it almost once a week for six months now, and I am surprised the blades have stayed sharp. I don’t want to say it is perfect. The safety grip is a bit unwieldy for most vegetables, and it can be tricky to store, but the benefits outweigh any problems. Professional mandolins or slicers normally cost over $100 and this does the job nearly as well.

I would give the Chef’s Envy 3.5 out of 5 stars and say it well worth the $35 price tag on their website. I love them for dicing lots of onions quickly and easily.

Try making my pesto caprese salad recipe below; the Chef’s Envy makes slices the tomato perfectly. It’s also great for the vegetable toppings at a burger night or just to slice lemons or limes.

I am in no way associated with Chef’s Envy. I just want to give you my professional opinion on the product. I will have more equipment reviews in the future.

Oh, I almost forgot! While I like the vegetable peeler I got for free the plastic juicer they gave me that is meant to be stuck straight into the top of a lemon or other citrus is useless. It was free, but if you’re not thinking about buying the Chef’s Envy and they are offering the juicer, don’t stay for the free gift.

Pesto Caprese Salad

Pesto sauce below (retain a few basil leaves for the salad)

1 tomato for each salad, sliced on a mandolin (If you can find affordable heirloom tomatoes they are best, but any tomato will work. Roma are often the cheapest.)

Mozzerella in salted water (Di Buffala is a amazing, but likely not available for a 5ive Dollar Feast budget. I recommend ovaline. Broncini is awfully small for a caprese salad)

  1. Drain and slice the mozzerella in similar sizes to the sliced tomatoes.
  2. Layer tomato slice, then basil leaf, the mozerella, and finally a little pesto. Continue to layer until the ingredients are used up.

Pesto Sauce

2 cups basil leaves, stems removed

¾ cups pine nuts (For a Five Dollar Feast, you will probably have to substitute almonds or walnuts, preferably toasted if you can buy them that way. Hint: Trader Joe’s has sliced toasted almonds very cheap.)

½ cup parmesan, grated

½ cup olive oil

2 to 3 cloves garlic, peeled and halved

salt and pepper to taste

  1. Combine all ingredients in a food processor and puree. Taste, and adjust ingredients to taste.

Crispy Skin Salmon with Pineapple Salsa

These days, for some unknown reason, most people are under the impression that you shouldn’t eat the skin of salmon. Well, I am here to tell you that you should. Nothing is quite as breathtaking a crisp salmon skin.

First, season the salmon very simply with salt and pepper. Then the trick is to heat a few Tablespoons of olive oil in a pan or skillet until good and hot. The oil will take on a shimmering sheen when it is ready. Now, add the salmon, skin down, to the hot olive oil and let it get nice and crispy. Then when you flip it to cook the other side, the crisp skin will be on the top of the salmon and should be served that way. Use a sharp knife to cut down through the skin and into the meat of the salmon underneath and eat the whole piece skin and all. Delicious.

A good way to enjoy this fish can be topped with a fruit salsa. This time I made a pineapple salsa, but you could also use a mango avocado salsa.

With both Pineapples and wild salmon (don’t used farmed, please, it is bad for you and bad for the planet) on sale this time of year, this is a great spring meal. Serve this with your favorite side of wild rice, pilaf, pasta, or in my case polenta. I just followed the instructions for corn meal mush on the side of my cornmeal box.

Crispy Skin Salmon 

3 Tablespoons olive oil

1 filet of salmon, halved

salt and pepper

  1. Heat the olive oil on medium high heat in a pan or skillet until hot and shimmering. Add the salmon, skin side down, 3 to 5 minutes depending on the thickness of the filets.
  2. After a few minutes the meat of the salmon in the pan should be turning a nice flakey pink while the top should remain raw. Using a good spatula, flip the fish gently. (The best method, if you are up for it, is to use one hand on the raw uncooked top of the fish that should remain cool to the touch. This will allow you the most control. Be very careful for oil splattering, of course.)
  3. Continue to cook another 3 to 5 minutes until the entire fish is pink and cooked through. Serve immediately over polenta, wild rice, or pasta with the skin facing up. The skin should be slightly golden brown.


Pineapple Salsa

1 fresh pineapple

½ red onion, finely chopped

1 jalepeno, seeds removed and minced (optional)

1 bunch of cilantro, chopped coarsely

lime juice to taste

salt and pepper to taste

  1. Cut the rough sides of the pineapple. Then slice wedges off the pineapple from the hard inedible center. Dice these wedges into ¼” cubes.
  2. Mix the diced onion, cilantro, optional jalepeno, lime juice, salt and pepper together and taste. Adjust flavors as needed.

This salsa is great on large variety of foods. You can use it to top fish, a carnitas taco, or even serve it in a hollowed out pineapple shell for a fancy party treat served with colorful tortilla chips.


Follow

Get every new post delivered to your Inbox.

Join 119 other followers